DMARC – What it is and why it matters
Protect your audience, your brand, and your sending reputation using DMARC. This guide takes a look at what it is and why it matters.

Reputation.
This one word has the power to make or break your brand. Why not protect it every chance you get?
The internet gives companies and customers alike endless opportunities to connect and build relationships. But it also gives spammers and phishers an equal number of opportunities to hurt your audience and damage the reputation you worked so hard to establish. And without a positive sender reputation, all your emails might end up in the spam folder, hurting your ROI.
Enter DMARC – a layer of defense between your brand’s reputation and the people who would use it for their own gain.
What is DMARC?
DMARC stands for Domain-based Message Authentication, Reporting, and Conformance. It’s a DNS TXT record that protects against phishing and email spoofing by letting senders indicate their messages are protected by Sender Policy Framework (SPF) and DomainKeys Identified Mail (DKIM). If a sender’s message fails these authentication methods, it’s their DMARC policy that determines how to handle the message.
Why you need DMARC
There are plenty of spammers, spoofers, and phishers who will jump at the chance to use your sending and brand reputation (and run them into the ground) for their own gain. With 95 percent of hacking attacks and data breaches originating from email, purposefully protecting your domain and your customers has never been more relevant and important.
Once you’ve set up your DMARC policy, if a message is sent from an unauthorized source, that policy determines what happens to that message (like whether it’s quarantined in spam, rejected outright, or accepted).
Not all receiving servers will check a DMARC record before accepting a message, but adoption is growing. Popular email servers that enforce DMARC include:
Examples of DMARC records
DMARC records can be simple or complex, depending on the number and type of mechanisms used. Here’s an example of each:
Simple
- v=DMARC1;p=none
This is the most simple DMARC record. When the policy (“p”) is set to none, receivers will ignore the outcome of the SPF and DKIM checks. However, it’s not effective unless you add additional rules to make it more robust.
Complex
- v=DMARC1; p=reject; rua=mailto:dmarc@yourdomain.com; ruf=mailto:dmarc@yourdomain.com; rf=afrf; pct=100
This DMARC record is rejecting all unqualified mail sent from the domain. All messages (100 percent) are filtered. Also contained in this DMARC record are the email addresses to which aggregate and forensic reports are to be sent.
Basic rules for DMARC records
DMARC records are versatile and customizable, so you can set yours up in the way that suits you best. While at first glance the list of mechanisms and rules may seem overwhelming, we recommend starting your first record with the p=none, moving to a more advanced record only when you’re feeling like you’ve gotten the hang of it.
Below we’ve listed some of the rules that can be used in a DMARC records.
How to implement DMARC
You’ve learned how important DMARC is for protecting your sender reputation, and you’ve learned what DMARC rules and records you can implement. Now it’s time to learn how to actually set up your DMARC policy.
Step 1: Set up SPF and DKIM before setting up DMARC
Messages that don’t pass SPF or DKIM will trigger your DMARC policy, so you need these authentication policies in place before you establish DMARC.
Step 2: Align your domain and verify it
Open all email headers from your emails and identify the domain or subdomain, which is listed in three places:
- Mail-from
- Header from
- The “d=” field in the DKIM signature
If these domain names are all identical, they’re aligned. Otherwise, you’ll need to enlist the support of your IT department to move forward.
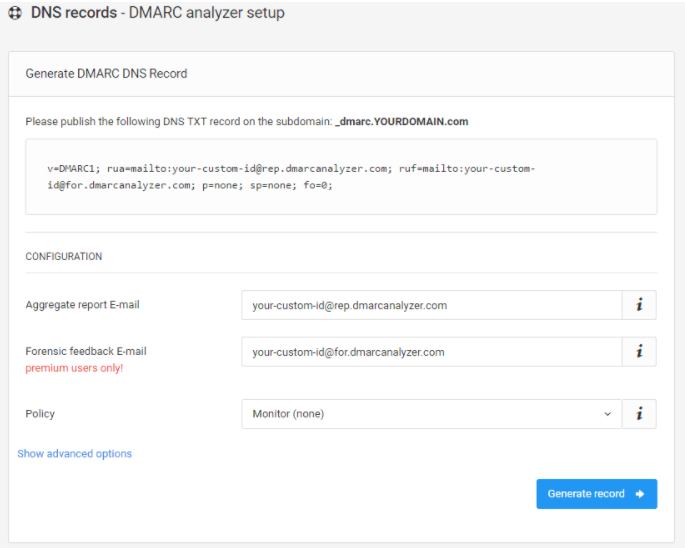
Step 3: Generate a DMARC TXT record
You can generate a DMARC TXT record using the rules we mentioned earlier, or you can simply use a free DMARC generator.
If you create a DMARC record on your root domain, it applies for all the underlying subdomains.
Step 4: Implement DMARC into DNS
Working with your DNS administrator, add your DMARC policy to DNS to start receiving reports at the mailto: address you’ve specified in your record.from your domain.
Step 5: Modify your DMARC policy flags
As mentioned above, once you become more experienced with handling your DMARC policy, update your tags from “none” to “quarantine” or “reject.” Doing this progressively gives you more confidence in your ability to manage your policy and any infractions you’re alerted to.
Start protecting your reputation today
By implementing DMARC, you’re taking proactive steps to protect your sender reputation in particular and your brand overall. And remember that if you’re struggling to find time, it only takes five simple steps to get started.
Ready to create your DMARC record but need more help setting policies? Use a free DMARC generator if you need help getting started, but take action today to safeguard your brand, customers, and sending reputation. The spammers and spoofers aren’t waiting around, so why should you?